
Knitted Yarn Stash Blanket
if you are a keen knitter you will soon build up a collection of odds and ends of wool left over from finished garments, or sometimes projects not started! These can soon take up a lot of space and you really can’t throw them away.
There are lots of ideas online about how to use up some of your stash and the results are invariably satisfying partly because you have used wool that would have gone to waste and also you end up with a lovely cosy colourful blanket or throw for free, not to mention the fun of knitting or crocheting it.
I love this particular idea because it is very simple, flexible and you can just pick it up anytime and do a few rows without having to worry about where you got to or concentrating on a complicated pattern…great for stress free knitting.
The idea
You simply knit every row (garter stitch) and change your yarn at the end of each row tying the new end on to the previous colour with a double knot, leaving 10cm tails which will become a fringe on each side of the blanket, so no sewing in ends or sewing up either! I did a few rows of my predominant colour to start and end with, to finish off the edges.
Choosing the yarn
The last blanket I knitted was in shades of beige and cream and although I had quite a lot of those colours, I did find a few more in Fabric Magic’s bargain wool bin of various textures to give it interest.
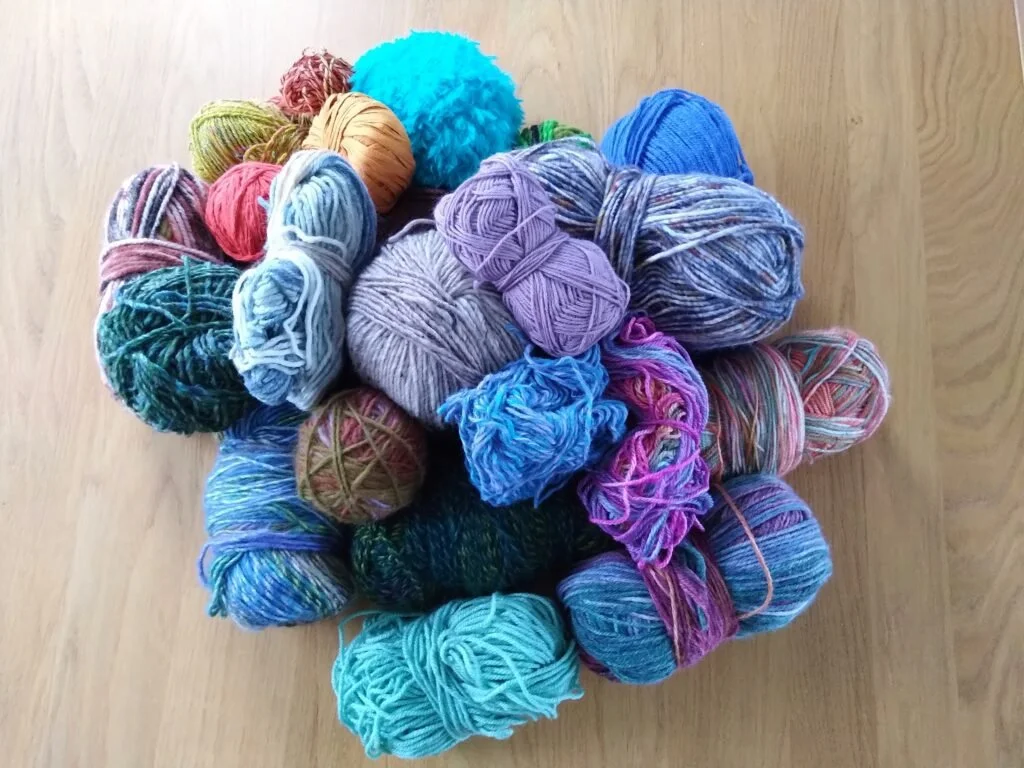
You can use any small lengths of yarn of any thickness so long as it is long enough to do one row. I got out all my stash and found I had a lot of multicoloured yarns in earthy and jewel colours. It is quite likely that your stash will reflect your taste and be noticeably within a colour palette!
Putting them together in a group, take out any that you don’t like or don’t blend in – I took out all the pastel ones.
You could just choose two or three colours; you may need to buy a few more to have enough variety in your chosen colours – you will need around 1200grams for an average blanket.
The size
You can do a tension square using one of the midweight yarns and your chosen needles to calculate a finished size. If you do a small square you can also calculate approximately how much yarn you are going to need by weighing your square and compare the area with that of the finished blanket. If you’re not sure how to work it out you can always ask the helpful staff here, we are always interested in people’s inspiring projects!
With 8mm needles I worked out that I would need 120 stitches to make a blanket about 100cm wide. It is easier to approach from the narrow end, then you can keep going until you are happy that it is the right shape or you run out of wool. I would expect it to be about 130cm long. Cast on with the thumb method as it gives you plenty of stretch; really important if you are using a large needle.

The needles
In my beige blanket the finer yarns ended up being a bit loopy because I used a very large needle (10mm or 12mm I think) so this time I decided to use a smaller size 8mm – you will have a lot of knitting to do so you may as well use a needle size you are comfortable with. I have a favourite Knit Pro pair in 8mm in a lovely smooth wood with good points (much easier for doing garter stitch). They will need to be fairly long (35 or 40cm) or circular ones to take all the stitches.
I liked the closer texture you get by using smaller needles, and I also decided to double up any of the yarns that were a bit thinner. I simply wound off half the ball into a new ball (using kitchen scales) then used it double when I came to that particular colour. If you prefer to use the fine wool as it is, it should be alternated with the thicker ones. You can knit the colours in any order or completely at random bearing in mind that the larger balls should be used more often to keep the variety going until the end. You can always add in new yarns as you go along. Choosing how to use your colours is all part of the fun!

The fringe
After many happy relaxing hours of knitting, you should have a lovely soft and cosy memory blanket that will remind you of past projects. You can either just trim the loose ends to no less than 5cm or tie them into groups like I did, five yarns at a time (the doubled-up ones counting as one) and then trim them to the desired length.
I found it very hard to put down, just one more row……(I’ve not quite finished yet so no photo of the completed item!)